Introduction
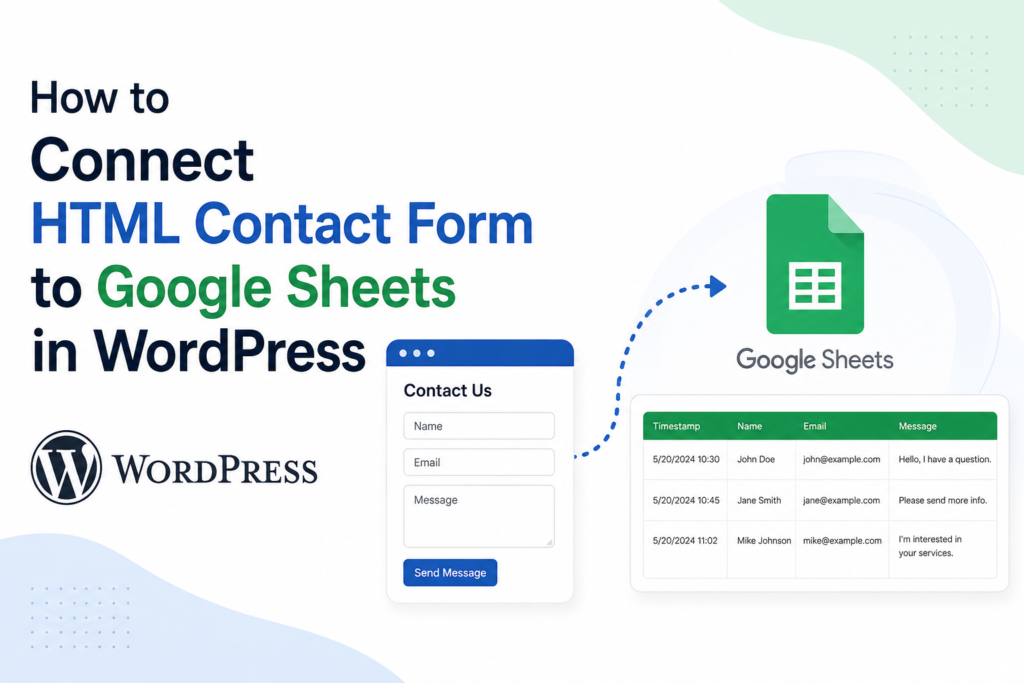
If you’re looking for a lightweight, fast, and completely free way to collect leads on your WordPress website, creating a WordPress contact form without plugin is an excellent choice.
Most website owners install plugins such as Contact Form 7 or WPForms. While these tools are powerful, they also add extra files, increase maintenance, and can affect website performance.
A custom HTML form connected to Google Apps Script lets you collect visitor information and automatically store it in Google Sheets without relying on any WordPress form plugin.
Whether you own a business website, agency, portfolio, or landing page, this solution is simple, secure, and easy to customize.
Why Use a Contact Form Without Plugin?
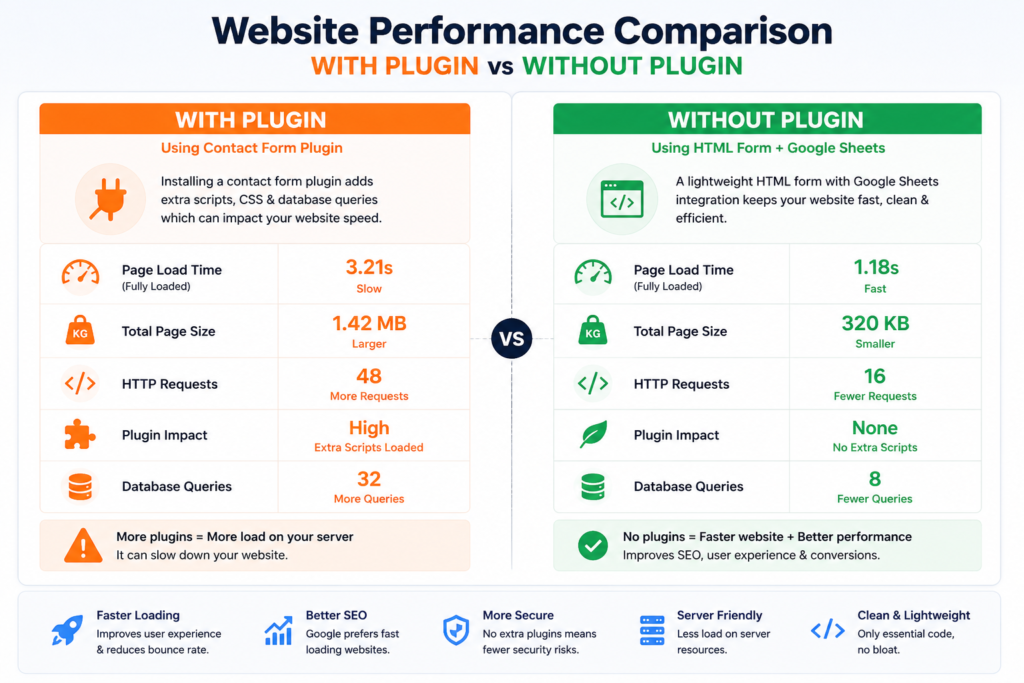
Using a custom HTML form offers several advantages:
- Faster website loading
- No plugin conflicts
- Better Core Web Vitals
- Full control over the design
- Easy customization
- Free Google Sheets integration
- No database bloat
- Ideal for small business websites and landing pages
What You’ll Need
Before you begin, make sure you have:
- A WordPress website
- A Google account
- Google Sheets
- Google Apps Script
- HTML contact form code
- Internet connection
No additional plugins are required.
Step 1: Create an HTML Contact Form

- Log in to your WordPress Dashboard.
- Navigate to Pages → Add New.
- Create a page called Contact Us.
- Click Edit with Elementor
- Add a HTML block.
- Paste your HTML code.
Your form includes:
- Name
- Phone Number
- Email Address
- Submit Button
Leave the following line unchanged for now:
const scriptURL = "WEB APP URL";You’ll replace it after deploying Google Apps Script.
Step 2: Create a Google Sheet
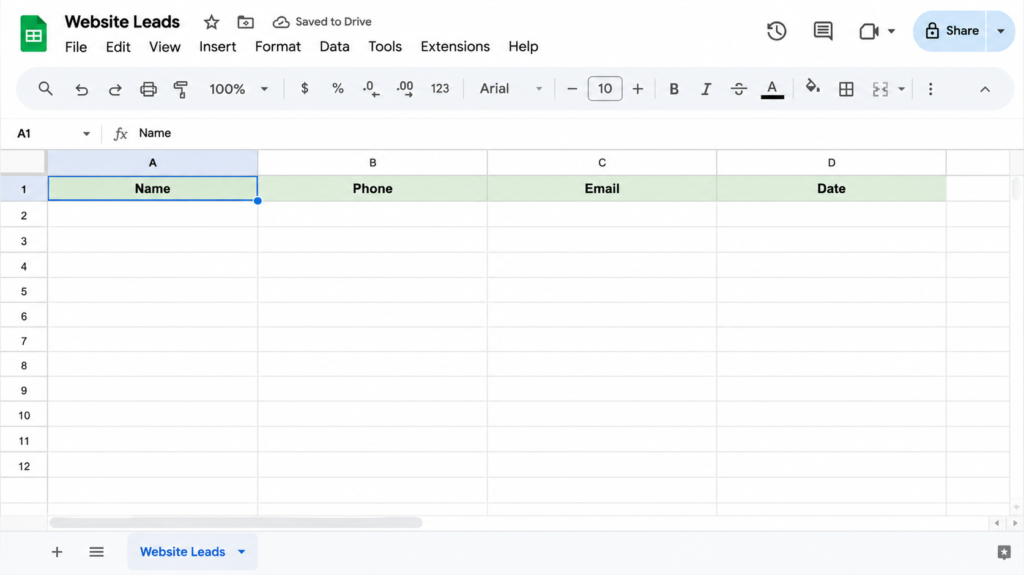
Open Google Sheets and create a new spreadsheet.
Example name:
Website Leads
Create these columns:
| Name | Phone | Date |
|---|
Every form submission will be stored here automatically.
Step 3: Open Google Apps Script
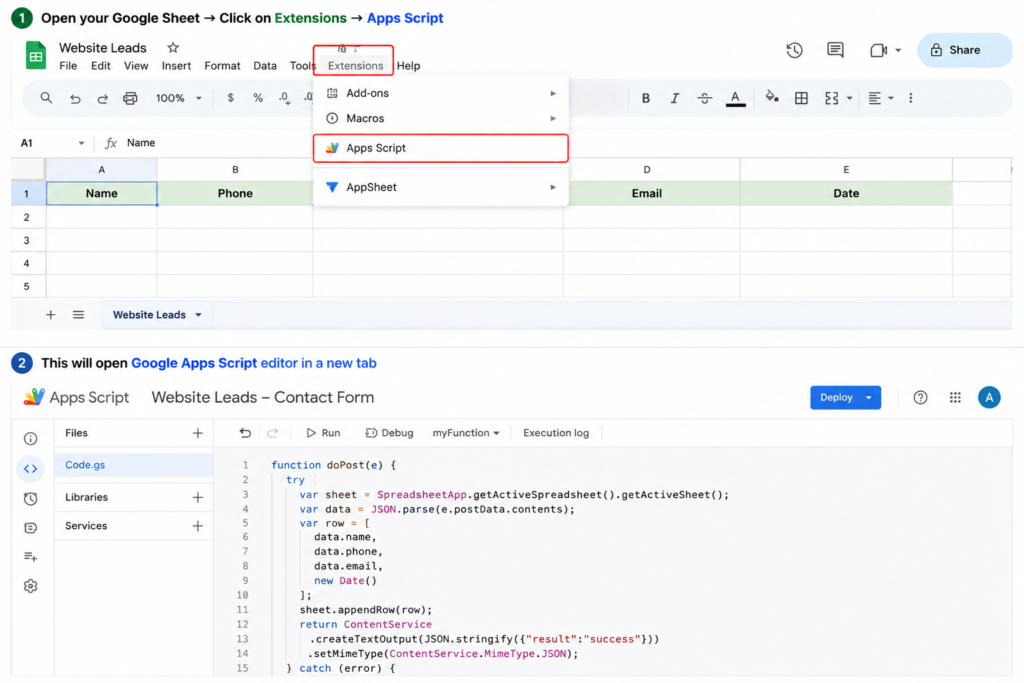
From your spreadsheet:
Extensions → Apps Script
Delete the default sample code.
Step 4: Paste the Apps Script Code
Paste your Apps Script code into the Page.
Replace:
.openById("YOUR_SPREADSHEET_ID")with your Spreadsheet ID.
Replace:
.getSheetByName("Website leads")with your actual sheet name.
Save the project.
Step 5: Deploy as a Web App

Click:
Deploy → New Deployment
Choose:
- Web App
Configure:
- Description: Contact Form API
- Execute As: Me
- Who Has Access: Anyone with Google account
Click Deploy.
Step 6: Authorize the Script
Google may display a warning.
Click:
- Advanced
- Go to Project
- Allow
This grants permission for the script to write data into your Google Sheet.
Step 7: Copy the Web App URL
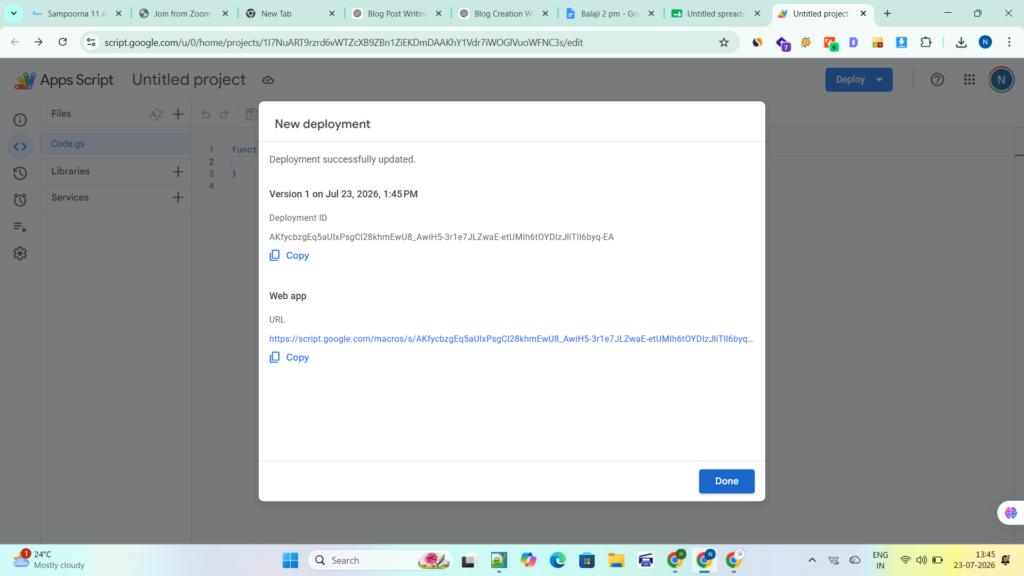
After deployment, Google generates a Web App URL similar to:
https://script.google.com/macros/s/XXXXXXXXXXXX/exec
Copy this URL.
Step 8: Update Your HTML Code
Replace:
const scriptURL = "WEB APP URL";with your deployed Web App URL.
Example:
const scriptURL = "https://script.google.com/macros/s/XXXXXXXXXXXX/exec";Save the HTML file.
Step 9: Publish the Contact Page

Click Publish in WordPress.
Visit the page to ensure the contact form loads correctly on desktop and mobile devices.
Step 10: Test the Contact Form
Fill in:
- Name
- Phone Number
- Email Address
Click Submit.
Open your Google Sheet.
You should see the submitted information along with the submission date and time.
Troubleshooting
Form Not Submitting
- Verify the Web App URL.
- Ensure the deployment is active.
- Check your browser console for errors.
Permission Denied
Make sure the Web App is deployed with appropriate access permissions.
Data Not Appearing
- Verify the Spreadsheet ID.
- Confirm the sheet name is correct.
- Redeploy the script after making changes.
Authorization Failed
Open the Apps Script editor and authorize the project again.
Security Tips
To improve security:
- Validate user input.
- Use HTTPS.
- Add a hidden honeypot field to reduce spam.
- Consider Google reCAPTCHA if your website receives a high volume of spam submissions.
- Keep your Web App deployment updated.
Benefits of This Method
- Lightweight
- Fast loading
- No plugin maintenance
- Easy to customize
- Free to use
- Stores leads automatically
- Works with most WordPress themes
- Suitable for agencies, freelancers, and small businesses
Frequently Asked Questions
Yes. A custom HTML form combined with Google Apps Script can collect and store submissions without installing any WordPress form plugin.
Yes. Google Apps Script is free within Google’s usage limits.
Absolutely. You can extend the form with fields such as Message, Company Name, Subject, or Address by updating both the HTML form and the Apps Script.
Yes. The HTML and CSS can be made fully responsive for all screen sizes.
Conclusion
Creating a WordPress Contact Form Without Plugin is a smart solution for website owners who want a lightweight, customizable, and cost-effective lead collection system. By combining HTML, Google Apps Script, and Google Sheets, you can capture enquiries efficiently while keeping your WordPress site fast and easy to maintain.
If you need professional help with WordPress development, SEO, or digital marketing automation, Digiteam can help you build high-performance websites and custom integrations tailored to your business.